How to Care for Prickly Pear Cactus: Expert Tips for Indoor & Outdoor Growing, Watering, and Winter Success
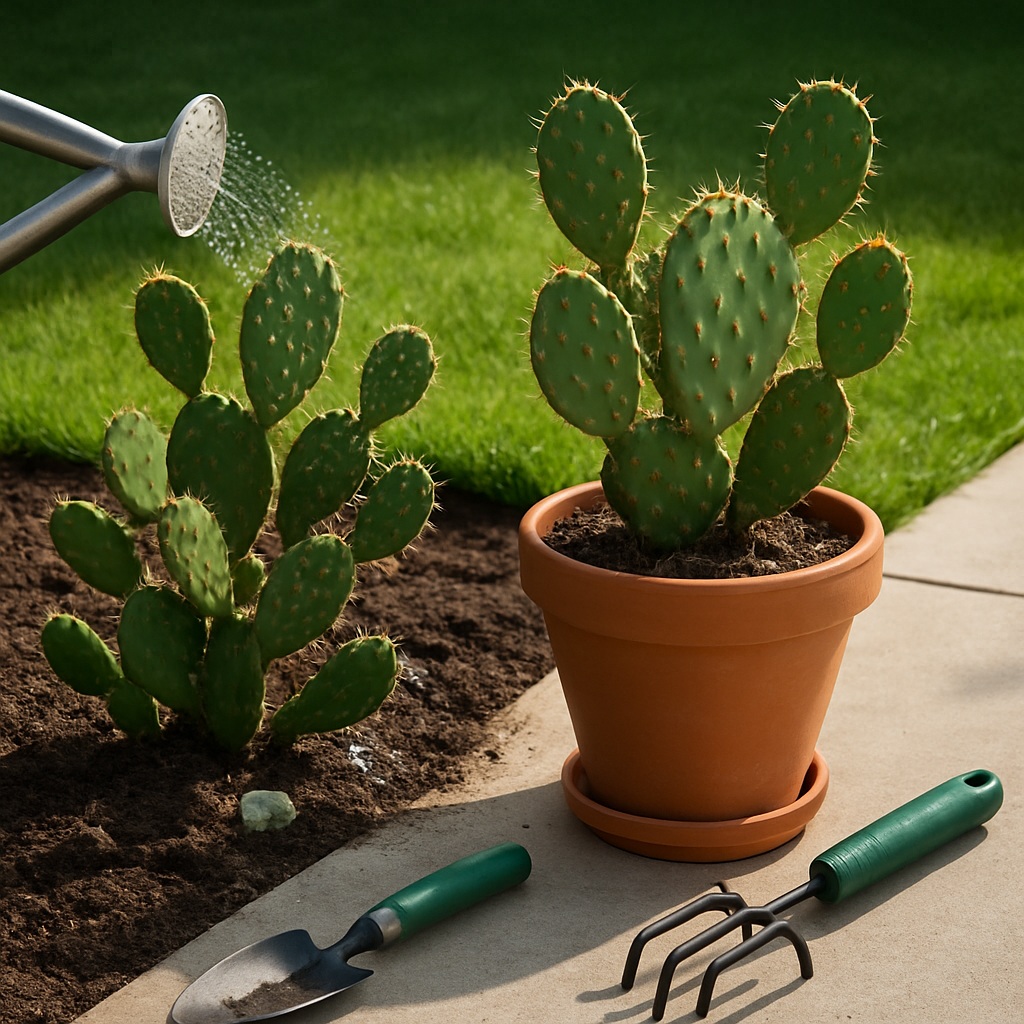
How to Care for Prickly Pear Cactus: Key Tips for Indoor, Outdoor, and Winter Success
Prickly pear cactus care comes down to well-drained soil, proper sunlight, careful watering, and seasonal adjustments. Whether you want to plant Opuntia as a houseplant or grow it outdoors, getting these basics right prevents rot and supports healthy pads, blooms, and even fruit. Many gardeners also wonder about winter care for prickly pear cactus or how to move it indoors; understanding these essentials means your plant can thrive year-round. Let’s dig into the details, from planting tips to best watering practices and winter strategies for helping your prickly pear cactus flourish, inside or out.
Planting Prickly Pear Cactus Indoors and Outdoors
Growing prickly pear cactus outdoors begins with the right spot: select an area that receives full sun for at least 6-8 hours a day. This sunlight fuels robust pad and flower development and helps prevent etiolation—where the pads grow weak and elongated due to lack of light. Soil must drain quickly; sandy, gravelly, or amended native soils with perlite or coarse sand ensure roots won’t remain soggy after rainfall or watering. When planting in the ground, keep pads at the same depth they were previously grown to discourage rot, which is a central risk for these succulents (Garden Design source).
Indoor planting is perfect if you want to enjoy prickly pear as a houseplant, especially in regions with harsh winters. Use a wide, shallow planter with multiple drainage holes and a pre-mixed cactus potting soil. Place a thin layer of gravel at the bottom for added drainage, mimicking the arid, fast-drying soil conditions these cacti love (The Spruce on indoor prickly pear). For either indoor or outdoor planting, handle pads carefully—use tongs and wear leather gloves to protect yourself and avoid abrupt pad loss caused by rough handling or accidental breakage.
Adapting soil amendments to your growing environment matters too. For those with heavy clay outside, dig a hole at least twice as wide as the root ball and amend the soil you remove with at least 50% drainage material like perlite, coarse sand, or fine gravel. For containers, be sure your soil is fast-draining, as standing moisture quickly leads to pad rot.
Watering Prickly Pear Cactus: Indoor and Outdoor Strategies
The watering needs of prickly pear cactus can confuse new growers, especially if transitioning plants between indoors and outdoors. As a rule, these cacti thrive on neglect—overwatering is far more dangerous than underwatering. Outdoors, your main watering job comes during the plant’s active growth, usually spring through summer. Water deeply, then let the soil dry completely before the next session. A simple finger test—insert your finger two inches into the soil—tells you whether it’s time; if there’s any moisture, wait a few days and check again (Cactus Outlet guide).
For houseplants, especially during winter, cut watering frequency drastically. Prickly pears grown indoors need water only every few weeks during dormant months, and sometimes less. Humidity in homes is typically higher than outdoors, so monitor soil moisture closely to avoid root rot. Use pots with drainage and never allow the container to sit in a saucer filled with water.
During hot, dry spells outdoors, young or recently transplanted cactus may require a bit more attention. However, as they establish themselves, reduce watering further. This encourages deep roots and pads that remain plump and healthy even in extended drought conditions.
Fertilizer Choices for Robust Pads, Flowers, and Fruit
Prickly pear cactus does not demand heavy feeding, but using the right fertilizer at the right stage can support healthy growth and bigger harvests of both pads and fruit. For young, establishing plants—whether being grown as an indoor houseplant or outside—a balanced 10-10-10 fertilizer provides an even boost of nitrogen, phosphorus, and potassium. This supports pad development and early root growth (Garden Design fertilizer advice).
Once established, consider switching to a 5-10-10 or even a 0-10-10 fertilizer. The higher phosphorus content encourages blooming and fruiting while reducing excess leafy growth that may lead to weak, unstable pads. If you’re growing the prickly pear specifically for the edible pads, a formula higher in nitrogen (the first number) helps generate new shoot growth, but balance is always key—too much nitrogen can make pads soft and more susceptible to pests.
Sparingly fertilize during active growth seasons, either spring or early summer. Indoor plants usually require even less frequent feeding, as their root zones are restricted by their containers. Use a diluted, water-soluble formula that is designed for succulents and cacti, and always water before and after application to avoid fertilizer burn.
Winter Care for Prickly Pear: How to Protect Indoors and Outdoors
Winter brings special considerations for prickly pear cactus, especially in climates with freezing temperatures. Outdoors, mature Opuntia species often survive brief freezes without trouble, but younger or potted plants are more sensitive. It’s common for pads to appear deflated in winter as a normal response to dormancy; moisture withdrawal from the cells helps prevent frost damage and pads usually rehydrate with spring warmth (The Spruce on winter dormancy).
To care for prickly pear cactus in winter, reduce or entirely stop watering once nights dip below 50°F (10°C); wet soil becomes hazardous as roots sit in cold, damp conditions. Mulching at the base with gravel or small rocks helps improve drainage for outdoor plants while also protecting roots from temperature swings. If your region endures extended freezes, move potted plants indoors or into a greenhouse where they will remain dry and protected from constant cold.
When overwintering inside, find your cactus the brightest, most direct sun exposure possible. South-facing windows are ideal, though supplemental grow lights may be needed if natural light is limited. Reduce watering significantly and avoid fertilizing until active growth resumes in spring—this keeps your plant healthy and prepares it for successful re-entry to outdoor life or the new growing season.
Pruning, Propagating, and Sharing Prickly Pear Pads
Prickly pear cactus rarely demands pruning, but you can certainly trim to manage size or rejuvenate older plants. Use tongs or leather gloves and a sharp knife to remove individual pads at the joint; this is not only for aesthetics, but can also reduce crowding, boost air circulation, and prevent disease. Removed pads are perfect for propagation or sharing with friends—let them callous over for several days in a dry, shaded area before planting (Cactus Outlet on propagation).
If you’re growing pads to eat, regular harvesting encourages continued new growth. When planting propagated pads, insert the calloused end one to two inches deep into well-drained soil and water sparingly until you see new root formation. For potted houseplants, repot once the roots outgrow the space or whenever pads become too top-heavy for their container.
Sharing prickly pear cuttings is a rewarding way to expand your indoor cactus collection or help others start their own. Always provide planting instructions, emphasizing the necessity of bright light and minimal water at the outset. Over time, both transplanted and propagated pads will toughen up, adapt, and begin to exhibit typical robust Opuntia growth patterns.
Common Prickly Pear Houseplant Problems and Expert Tips
- Overwatering and Rot: This is the main risk for indoor and outdoor growing. Always use well-draining soil and ensure containers and beds never hold excess water. Watch for yellowing pads and a mushy base—early signs of decay that require immediate action, including drying out the soil or repotting in fresh mix.
- Lack of Sun & Etiolation: Indoor houseplants can grow leggy and pale in low light. Move to the brightest available window, supplement with grow lights if necessary, and rotate your pot weekly for balanced pad exposure to light sources.
- Pest Infestation: While prickly pears are tough, poorly ventilated spaces or damp conditions attract mealybugs, scale, or spider mites. Regularly inspect pads for pests and wipe or spray affected areas with diluted rubbing alcohol or insecticidal soap to keep infestations in check.
Through attentive care, strategic planting, and mindful watering both indoors and outdoors, your prickly pear cactus can thrive for years, rewarding you with vibrant pads, striking blooms, and reliable winter resilience.


Comments
Post a Comment